
Introduction
You are an iOS developer and ready to submit the build to iTunes connect. You need iOS screenshots of different sizes to upload, but wait, you suddenly realise that you don’t have the necessary Photoshop skills or might be you don’t have the designer available at that moment.
Then, “frameit” comes to the rescue.
This article is about explaining how frameit helps you to add iOS frames to your app screenshots taken from device.
frameit is a part of an open source toolchain “fastlane“, which helps to animate beta deployments and releases for iOS and android apps. fastlane toolchain saves hours every time you push a new release to the store.
Lets start using frameit. You are going to love it.
Installation
As I mentioned, frameit is a part of fastlane tool. So we need to install fastlane first. Wait! fastlane is installed using commands in Terminal app in mac. No Installer. You are a developer, you must be loving these commands.
Installing fastlane is not straightforward. You should have “Homebrew” and “gems” installed in your mac. “gems” are preinstalled in mac these days. So, its the Homebrew you need to install. But Why we are installing Homebrew. because frameit internally used imagemagick library to add frames to the screenshots. So, we are taking help of Homebrew to install frameit.
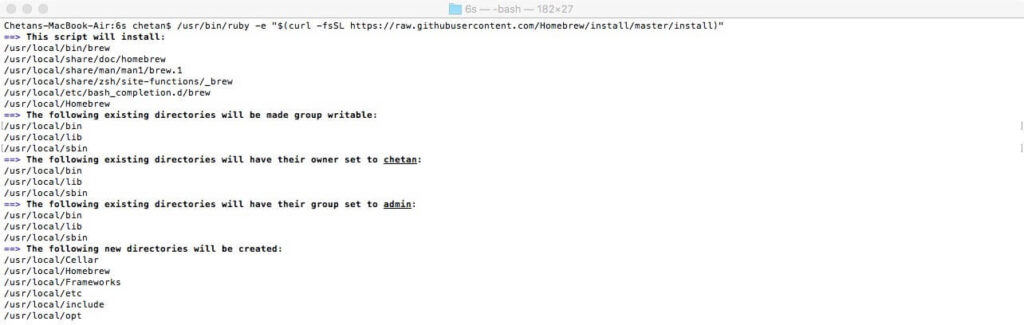
Run following commands in Terminal to install Homebrew and imagemagick library.
/usr/bin/ruby -e "$(curl -fsSL https://raw.githubusercontent.com/Homebrew/install/master/install)"Run above command to get Homebrew installed.

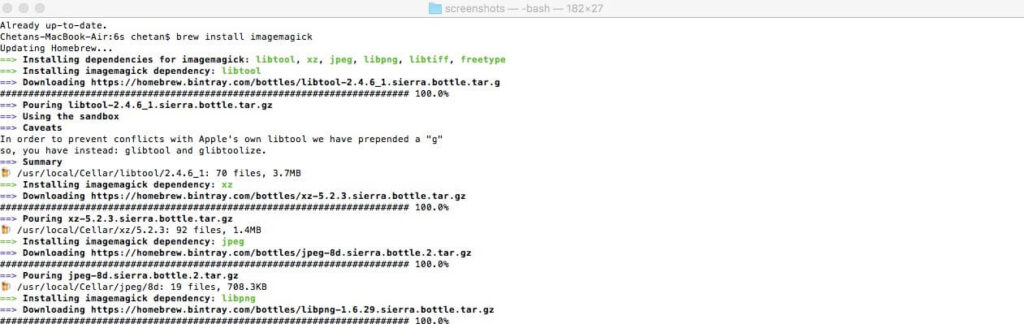
Now, it is time to install imagemagick library in your mac. Run following command in Terminal.
brew install imagemagick

Now, install fastlane gem.
sudo gem install fastlaneBut, when you will run the above command in the terminal in your macOS Sierra, You may encounter the following problem:


Apple introduces a new security system in its operating systems that prevent users to modify system files. It’s called “Rootless“. To overcome this issue, we need to install gem on /usr/local/bin Rootless doesn’t effect this path
So, this time, execute the following command in Terminal
sudo gem install -n /usr/local/bin fastlane
How to use it!
Let’s use Fastlane now!
Keep the screenshots you took from the device in a folder in png format something similar to the following:


Now, again open up the Terminal app and move inside the above directory.


Now, execute the following Fastlane command:
fastlane frameit
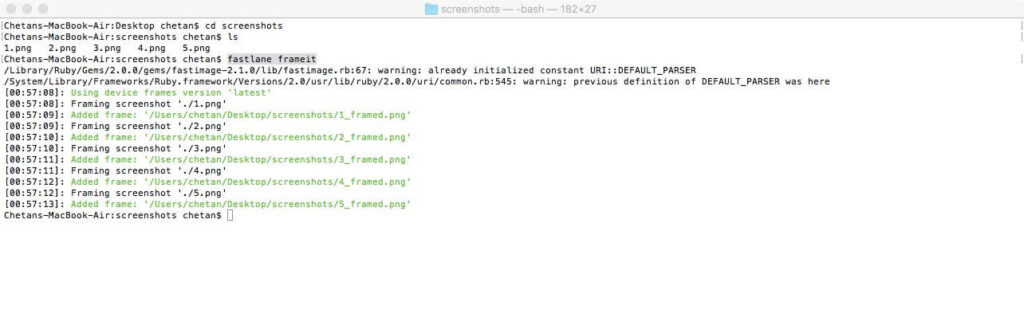
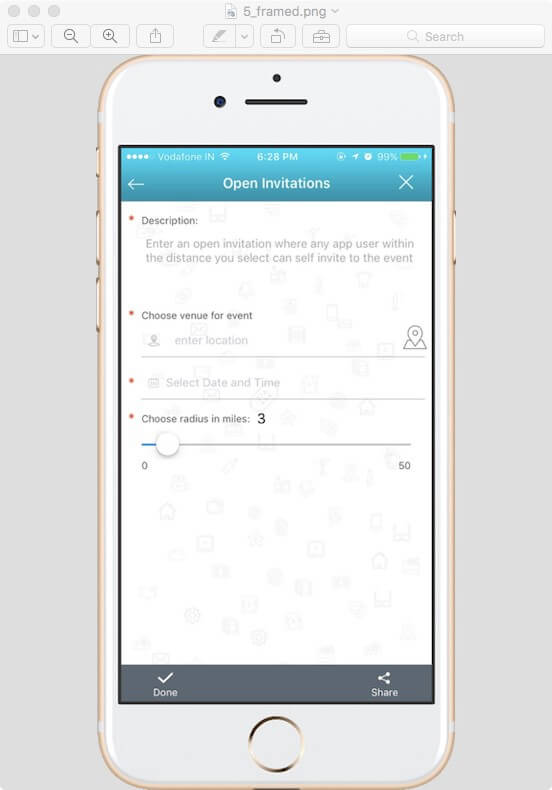
Your device screenshots are READY WITH FRAMES!
You are probably running frameit for the first time, So it takes a couple of extra minutes to download devices frames into your mac.

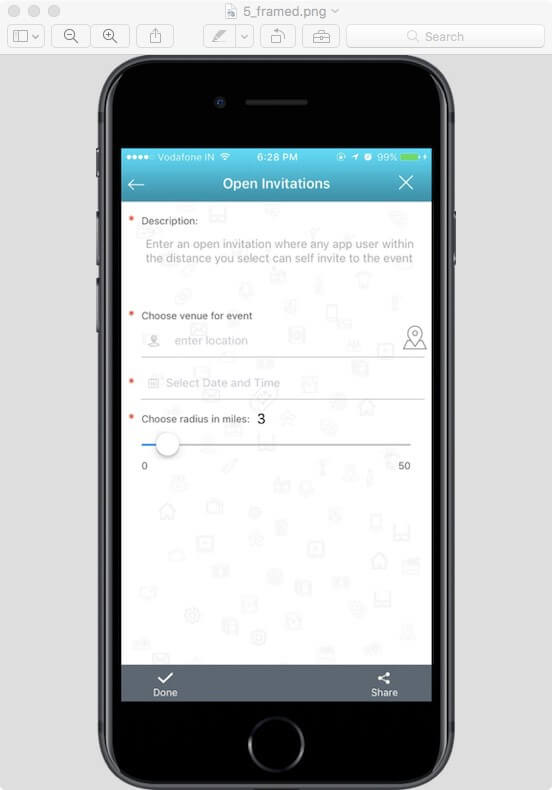
See, how beautifully frameit creates frames for your app. Isn’t Easy?
But, that’s not the end of the features of frameit. You can even change the frame color as well. If you want to see the frames in gold, run the following command in Terminal.
fastlane frameit gold
It takes just a few seconds to create it.
Using frameit, we can also add Titles to the screenshots and even can change the background color of the screenshots. We will cover those topics in the next article. I will also explain the remaining tools of Fastlane one by one. In the end, you will be able to use continuous deployment with your apps.
At BoTree Technologies, we build enterprise applications with our Mobile Dev team of 20+ engineers.
We also specialize in RPA, AI, Django, JavaScript, and ReactJS.