
Job Scheduling with Resque in Ruby on Rails
What is Job Scheduling?
Job scheduling is the process of allocating system resources to many different tasks by an operating system (OS). System manages priorities of job queues and allocate CPU time. It should determine which job to be taken from which queue and the amount of time to be allocated for the job. Such scheduling makes sure that all jobs are carried out fairly and on time.
To solve the purpose of job scheduling, there are many tools and libraries are available like whenever, crono, resque, rufus and many more. Today we are going to understand one of them which is widely used and has a variety of options for configurations and customizations which is Resque.
Resque is a Redis-backed library for creating background jobs, placing those jobs on multiple queues, and processing them later.
Resque-scheduler is an extension to Resque that adds support for queueing items in the future?
Setup Redis.
Before starting this tutorial, You’ll need redis to be installed on your machine. To install redis go through this link and follow all mentioned steps there.
You can use below command to start redis server once you install it properly:
$ redis-server
Setup Resque and Resque-scheduler.
Create a Rails application first and add these two gems to your Gemfile:
gem 'resque'
gem 'resque-scheduler'
Then do bundle install.
$ bundle install
Now start your application:
$ rails s
Now, you can create your resque jobs from within your application. A Resque job is nothing but a Ruby class or module with a perform class method.
A good practice is to create app/jobs folder and store your job classes there.
Create a file named sleeper.rb under your app/jobs folder.
class Sleeper
  @queue = :sleep
  def self.perform(seconds)
    puts "Sleep...>> #{Time.now}"
  end
end
Here, The @queue class instance variable determines which queue Sleeper jobs will be placed in. To place a Sleeper job on the sleep queue, we can write like,
Resque.enqueue(Sleeper)
The schedule file is a list of Resque job classes with arguments and a schedule frequency. The schedule is just a hash, but is usually stored in a YAML as shown below.
Define job schedules in /config/resque_schedule.yml:
sleep:
  every: 30s
  class: Sleeper
  args:
  queue: high
  description: Runs the perform method in Sleeper
Note: args is blank here. Reason behind this is that the worker class needs no argument here in its perform method. If you need to pass an argument to perform method then specify it here.
Now, to make this scheduler run through rake task, follow the below step.
Create a file lib/tasks/resque.rake and add the following code.
require 'resque/tasks'
require 'resque_scheduler/tasks'

task "resque:setup" => :environment do

  Resque.schedule = YAML.load_file(
  "#{Rails.root}/config/resque_schedule.yml"
  )
  ENV['QUEUES'] = 'default,sleep,wake_up,run'

end
Accessing Resque from browser.
Include below to your config/routes.rb and mount the application like this:
require 'resque/server'

Rails.Application.routes.draw do
  mount Resque::Server.new, at: "/resque"
end
Then restart your Rails server. Open up http://localhost:3000/resque in a browser to check out the web running jobs and schedules.
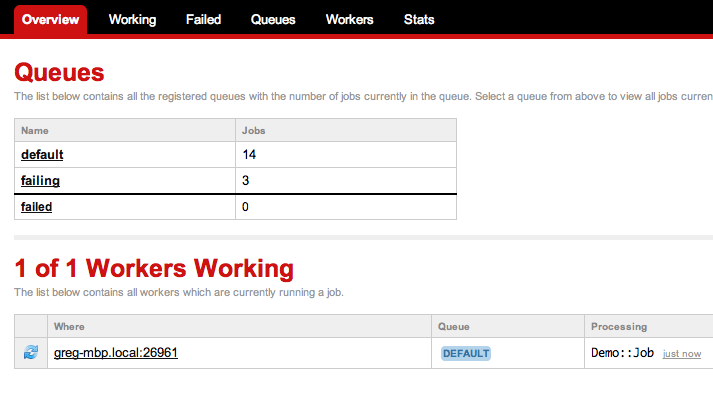
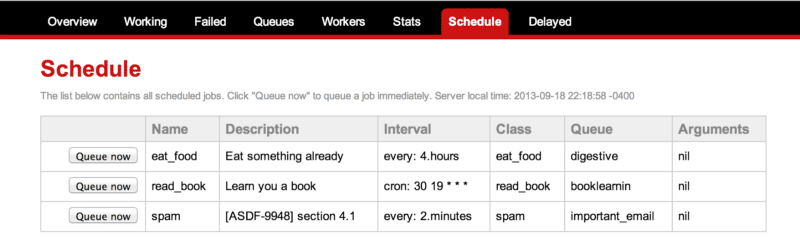
If you are using Resque-scheduler then it will add more options for you in the resque-web UI. Those options allows you to view queues and manually start queuing. Other option is for viewing pending jobs in the delayed queues.
To achieve this, add below lines to your routes.rb file:
require 'resque/scheduler'
require 'resque/scheduler/server'
Again, restart server, and refresh the browser page.
To start the scheduler:
$ rake resque:scheduler
You can get a working example here.
That’s it! In my next article, we will pick one more job scheduling library and will look into it.
Have a happy queuing!
At BoTree Technologies, we build enterprise applications with our RoR team of 25+ engineers.
We also specialize in RPA, AI, Python, Django, JavaScript and ReactJS.


