Taking Advantage Of Mailchimp Web Hooks
This article will guide you on how we can take the advantage of the Mailchimp web hooks in order to keep our database synchronized with mailchimp data. Actually in our database we stored the data from mailchimp user profile such as email, name and subscription status (i.e subscribed or unsubscribed).
Now to keep our database column updated there are two ways:
- Fire an mailchimp API call whenever the user signs in or update data once in day. But its way too costly. What if the profile data of the user updates occasionally ?
- Take advantage of the mailchimp web hooks which will only come into picture when data is updated at mailchimp.
Any intelligent programmer would always go with the second option. That a nice decision!

How to add web hooks?
- Go to Lists tab

- Create the desired List that fits as per your needs.
- Select the List for which you want to add the web hooks.
- Click Settings and then select Webhooks
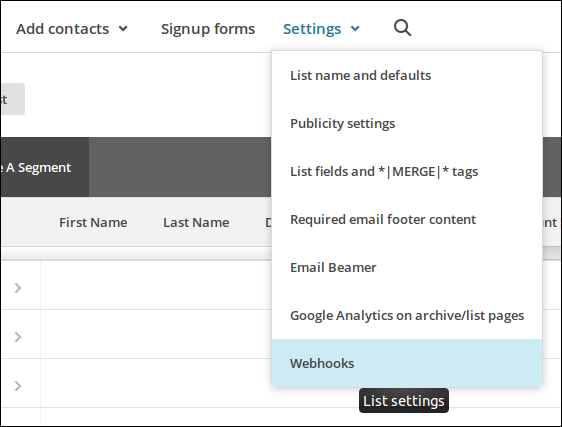
- Click Create New Webhook button.

- You will see following screen
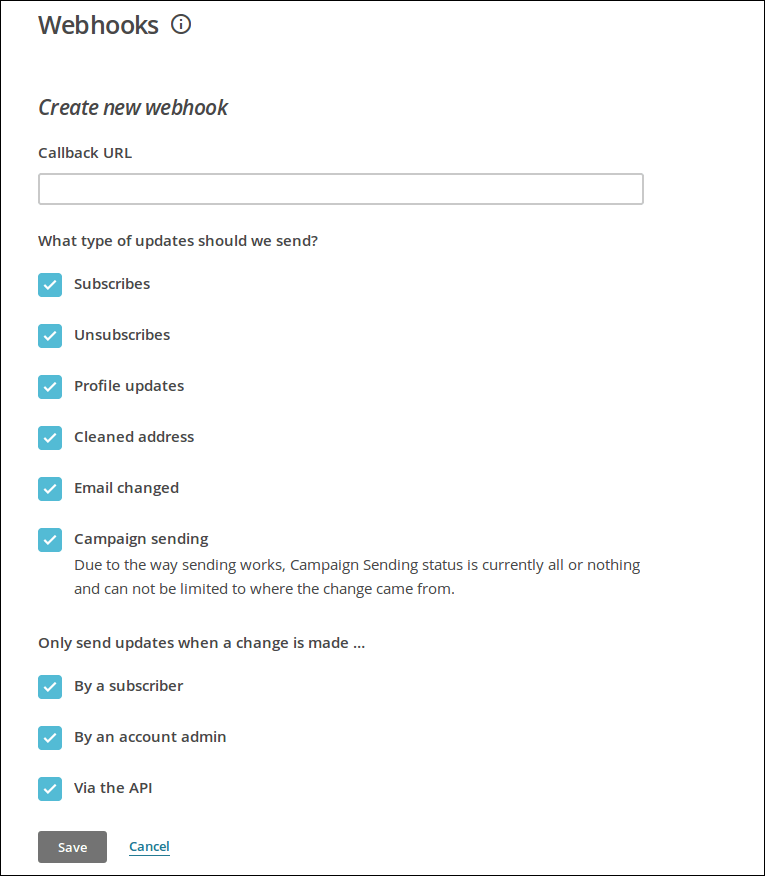
- Now in the callback URL text box, just add your URL on which you want to receive the callbacks.
- Select the check-boxes for which you want to receive the updates.
- That’s it! Now your web hook is configured and is ready to fire on any update 🙂
Let’s take an example of Email changed web hook.
Suppose the user changes the email on the mailchimp. This will fire your configured callback URL you will get following parameters.
We can figure out the type of the callback from params[‘type’].
It will be upemail for email change, subscribed when a user subscribes for a list, unsubscribed when a user unsubscribes from the list. etc.
In case of the email change callback we get the following things
- old_email this contains the email before update
- new_email this contains new email which user has updated
- list_id the id of the list on which user has made an update
- fired_at time at which email was updated
So on the basis of the parameters that we get in callback we synchronise the database!
So just follow the above steps and you re good to go !!!
Thanks for reading. If you liked it, press the heart button 🙂
At BoTree Technologies, we build enterprise applications with our RoR team of 25+ engineers.
We also specialize in Python, RPA, AI, Django, JavaScript and ReactJS.


