How to Configure Razorpay Webhook in Ruby on Rails
In this blog post, we are going to learn how to validate Razorpay payments in Ruby on Rails using webhooks.
What is a Webhook?
In software development services, validating payments and integrating the mechanism is highly important. Ecommerce marketplaces require this system to enable purchases and receive payments easily.
Let’s see how webhook helps in that implementation for Razorpay.
A webhook, also known as a web callback, is a method that enables an app or web service to send real-time information to another application.
Webhook is one of the key features that almost all payment gateway provides to tackle failed payments and track all the lost transactions.
Why should I Configure Webhooks for Razorpay?
Razorpay supports receiving payments through multiple payment modes. If you have set up Razorpay in your application, your customers can make payments for invoices through the Client Portal.
When the customer clicks the “Proceed to Pay” button, a Razorpay pop-up will open from which they can select a payment mode and make the payment. Once the customer authenticates the payment through OTP or other methods, the amount will be deducted from their account.
Next, Razorpay will notify your application for the payment to be recorded. However, the notification to record the payment in your application might fail as explained in the cases below.
So, configuring a webhook for Razorpay in Ruby on Rails ensures that your application is notified about the payment statuses and payments do not fail to be recorded.
Want to learn how to integrate Razorpay in your website using Ruby on Rails? Here’s how to do the Razorpay payment gateway integration.
Set Up Razorpay Webhooks
You can set up webhooks from your Razorpay Dashboard and configure separate URLs for live mode and test mode. You can find a dropdown on the top bar of the dashboard to switch the modes.
To set up webhooks:
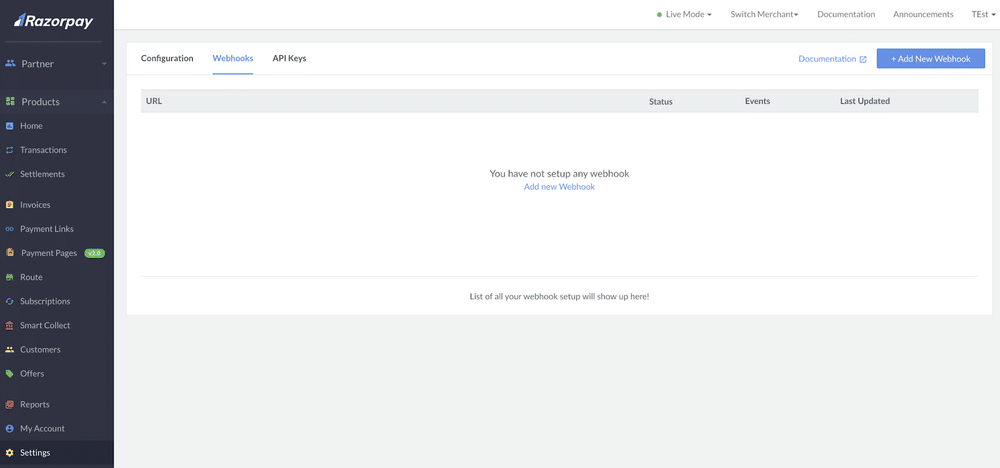
- Log into your Razorpay Dashboard and go to Settings > Webhooks.
- Click “Add New Webhook”.
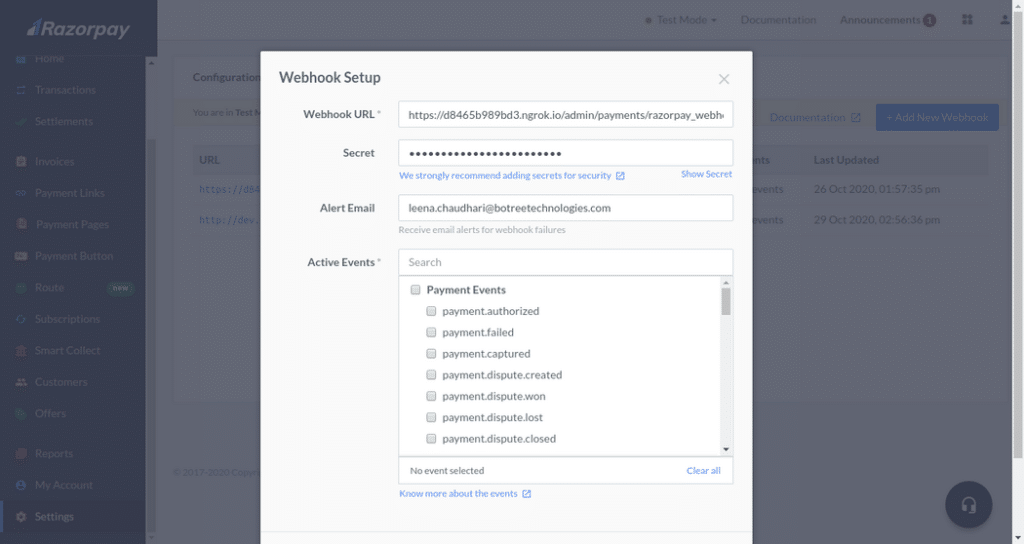
- In the Webhook Setup modal:
Enter the URL where you want to receive the webhook payload when an event is triggered. whenever a user pays money in the cart checkout, Razorpay will send an HTTP POST payload to your configured URL regarding the status of the payment so that you can update details in your database.
Enter a Secret for the webhook endpoint. The secret is used to validate that the webhook is from Razorpay. Note that test mode and live mode will have different secret keys.
In the Alert Email field, enter the email address to which notifications must be sent in case of webhook failure.
Select the necessary events from the list of Active Events. Sample payloads for all events are available.
- Click Create Webhook.
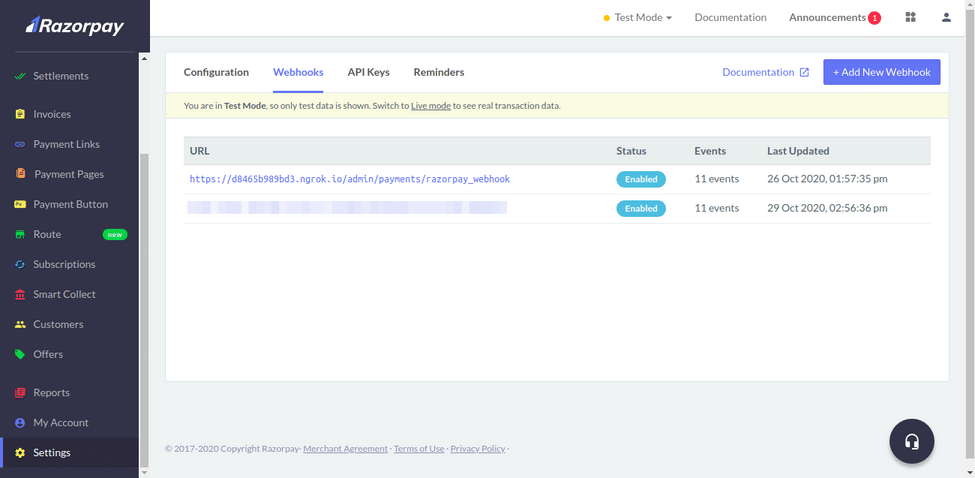
- Once created, it appears on the list of webhooks:
Validation
When your webhook secret is set, Razorpay uses the webhook secret to create a hash signature with each payload. This hash signature is passed with each request under the X-Razorpay-Signature header that you need to validate at your end.
Razorpay::Utility.verify_webhook_signature(webhook_body, webhook_signature, webhook_secret)
# webhook_body should be raw webhook request body
Handling webhook with Ruby on Rails
Tip: you could write concerns to group event handlers.
References
Check out sample payloads for the various webhook events in the following link. https://razorpay.com/docs/razorpayx/api/webhooks/#sample-payloads.
This is a simple guide that enables engineers at any software development company to configure Razorpay with a webhook. Since the payment mechanism offers different methods, it is important to record and track every transaction from every payment method.


